Overall Flow
Below is the basic flow to deposit into SuperEarn. (Asset: USDT)Overall flow summary
Overall flow summary
Set the recipient wallet to your MetaMask address
Select Kaia as the network
3 key points to double-check
3 key points to double-check
Address
- Verify that your MetaMask address is correct
- Recheck the first 6 and last 4 characters to prevent clipboard tampering/typos
Network
- Set the withdrawal network to Kaia
- If the network is wrong, asset recovery can be very difficult or impossible
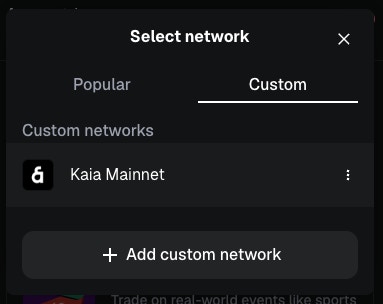
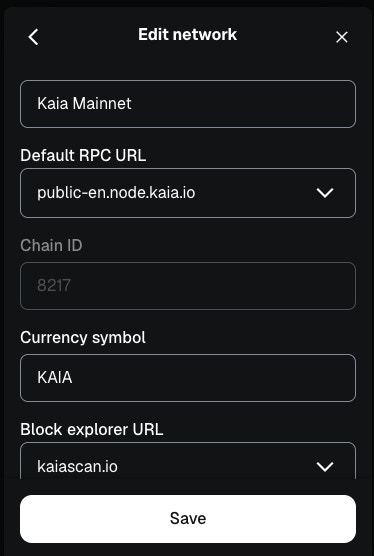
1. Prepare your wallet: Add the Kaia network
(For MetaMask users) SuperEarn automatically supports the Kaia network when connecting MetaMask, but we recommend adding the network manually beforehand to verify your wallet address and balance.For details, see the official Kaia docs.
Add the MetaMask network
Add the MetaMask network
Enter Kaia network information
- Network Name: Kaia Mainnet
- RPC URL: https://public-en.node.kaia.io
- Chain ID: 8217
- Currency Symbol: KAIA
- Explorer: https://kaiascan.io
Add the USDT token symbol on Kaia Mainnet
- Click the ’+’ button in the chain selection area
- Enter the token contract address
- USDT contract address:
0xd077a400968890eacc75cdc901f0356c943e4fdb - MetaMask will automatically recognize USDT. Click Next -> Import to add the Kaia USDT token.
OKX wallet, Kaia wallet, etc.
OKX wallet, Kaia wallet, etc.
2-1. Withdraw from an exchange to your wallet (Binance, Upbit, Bithumb)
Binance withdrawal flow (app)
Binance withdrawal flow (app)
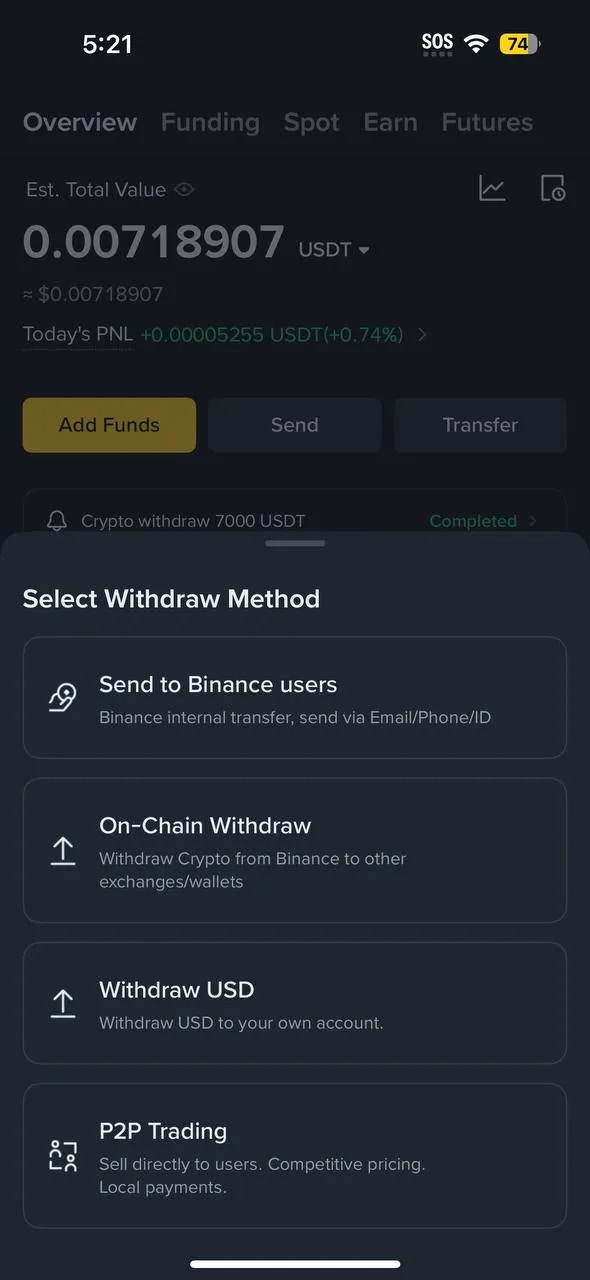
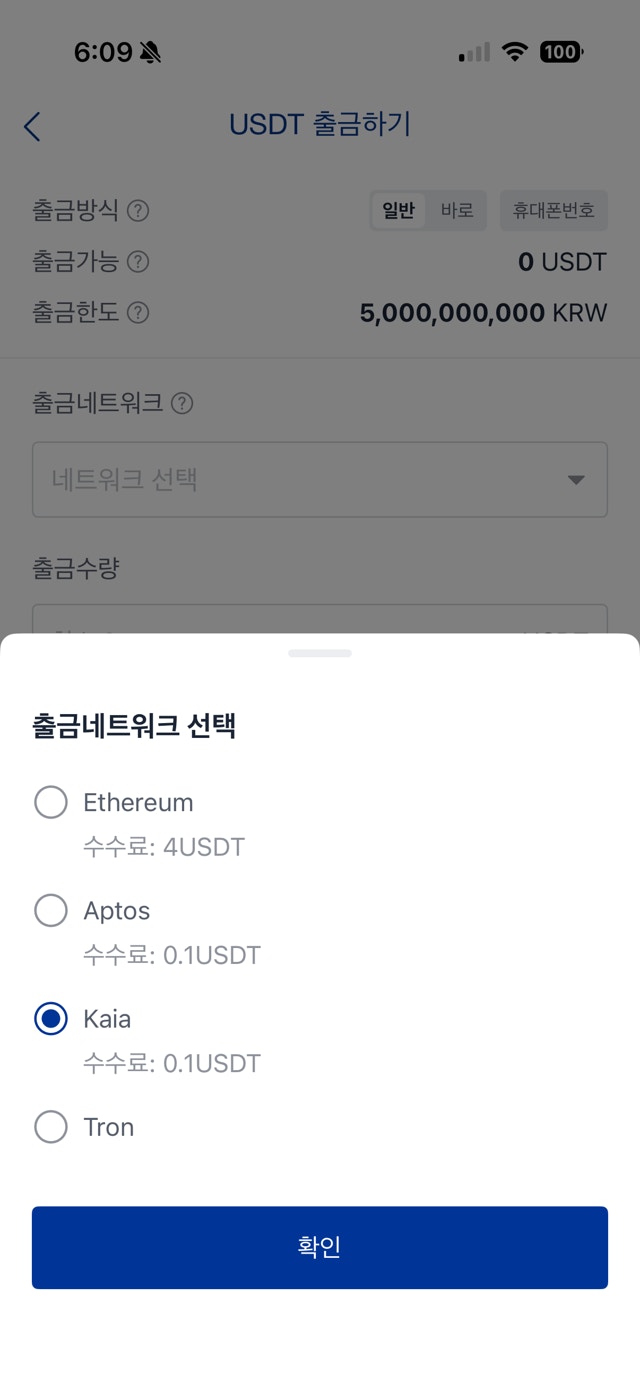
Enter withdrawal details
- Asset: USDT
- Address: Wallet address (0x…)
- Network: Kaia
- Amount: Enter withdrawal amount and check fee/final amount
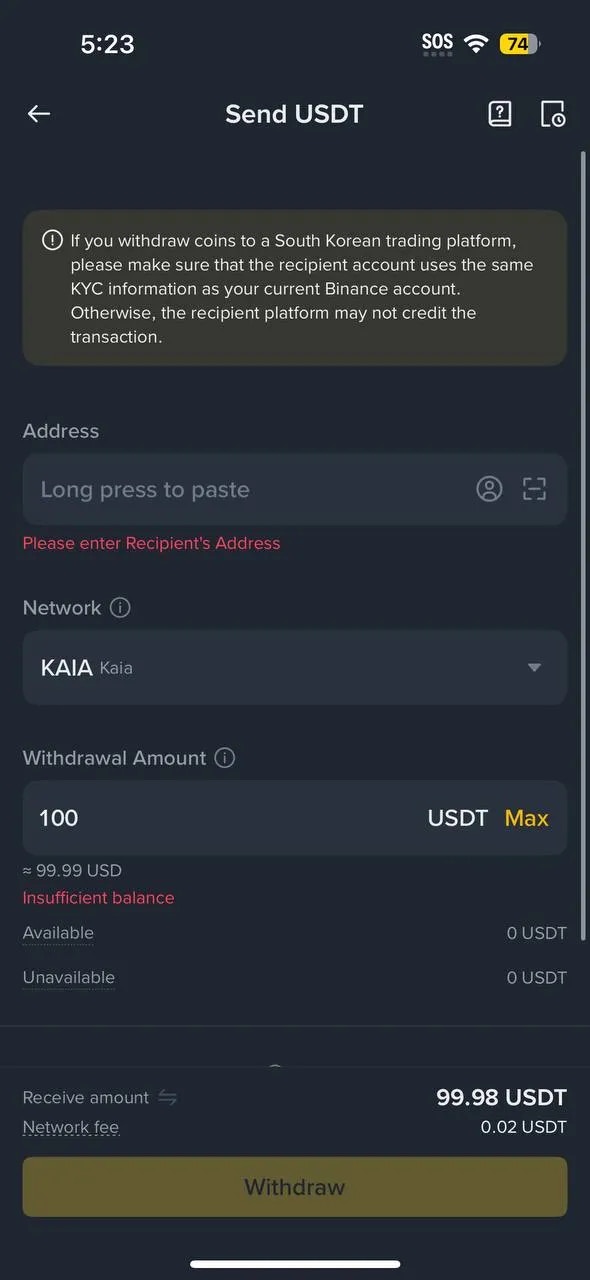
Warning: If the network is different, asset recovery can be very difficult or impossible.
Upbit withdrawal flow (app)
Upbit withdrawal flow (app)
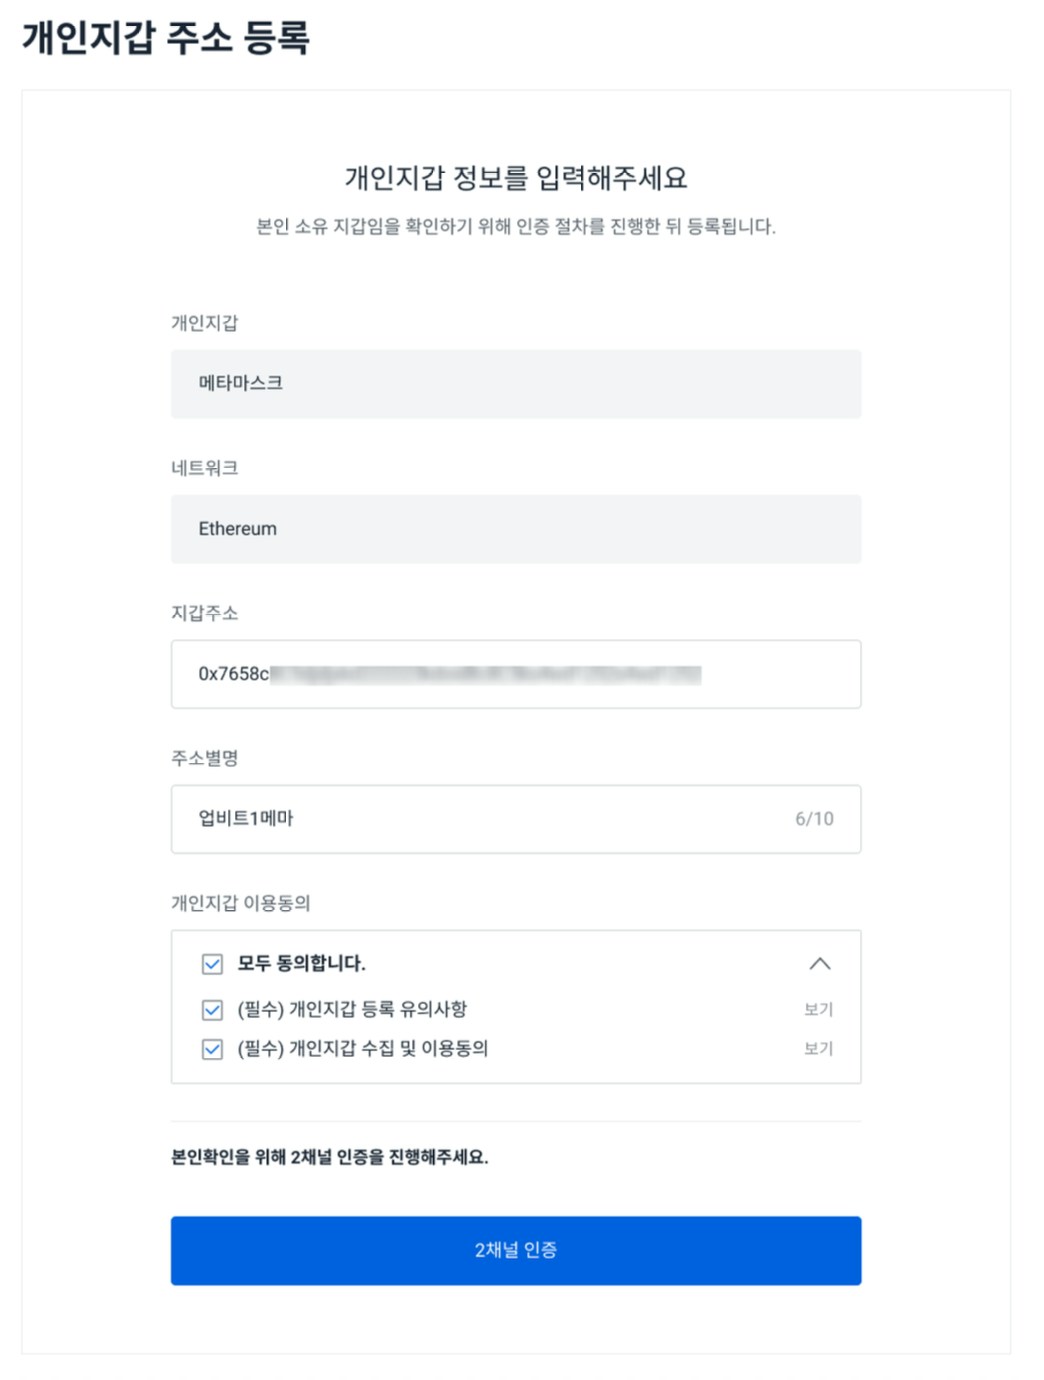
Register a personal wallet address (mobile example)
Under Upbit’s travel rule policy, you often must register a personal wallet (e.g., MetaMask) address before you can withdraw.
Deposit/Withdraw -> Settings -> Personal Wallet Address Management
Personal wallet address management -> Register address

Enter registration info and complete 2-channel verification
- Wallet address: Enter or link your MetaMask address (0x…)
- Address alias: Enter a recognizable name
- Proceed after completing 2-channel verification
Approve MetaMask signature
(it should not request your seed phrase/private key).
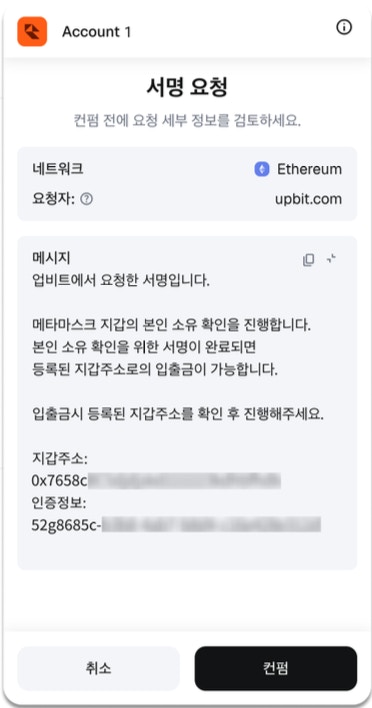
Confirm address registration
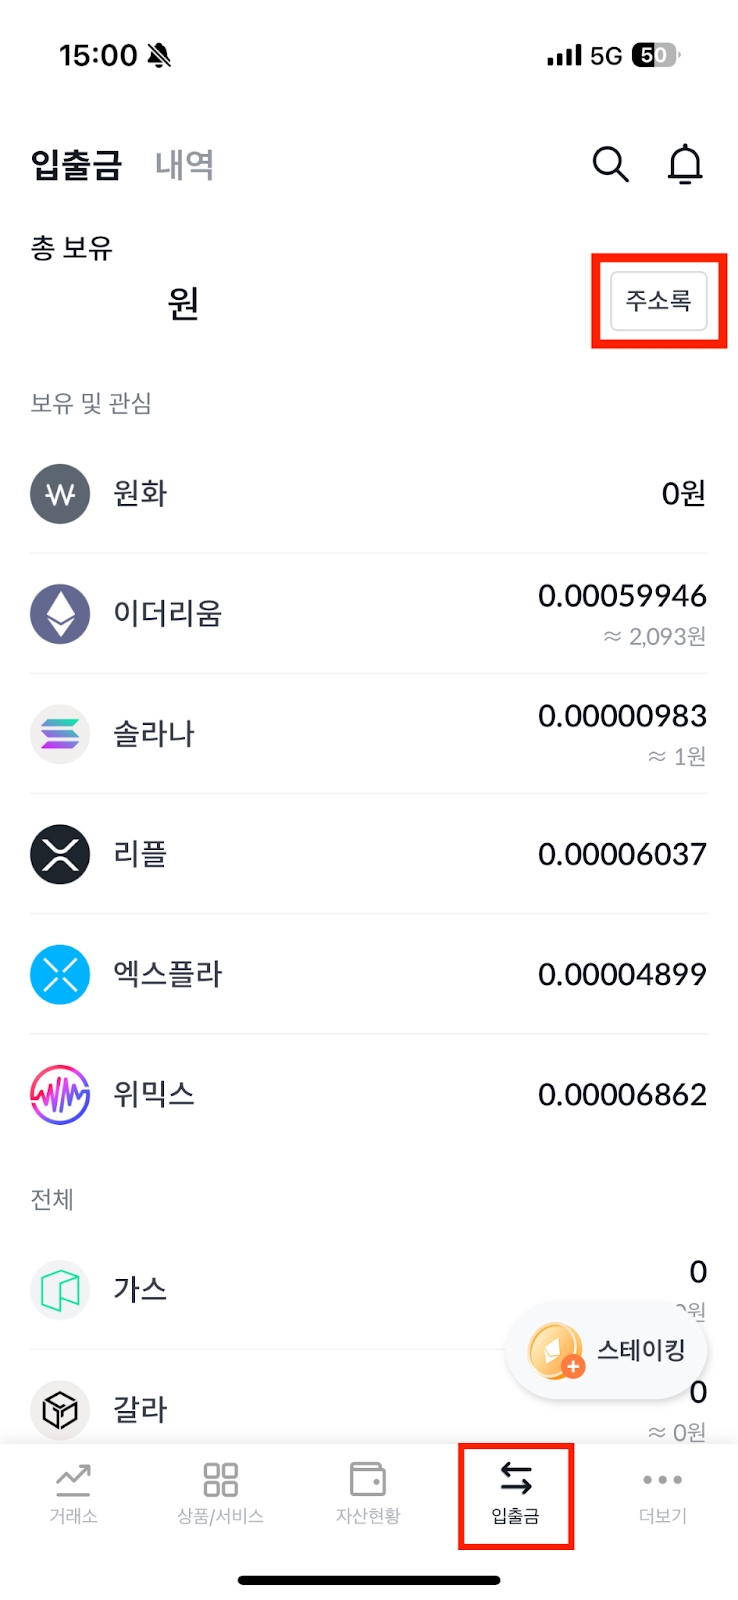
Open withdrawal screen and enter amount

Enter recipient/address (or select registered wallet)
Address: Select your registered MetaMask address
Network: Recheck that it matches Kaia
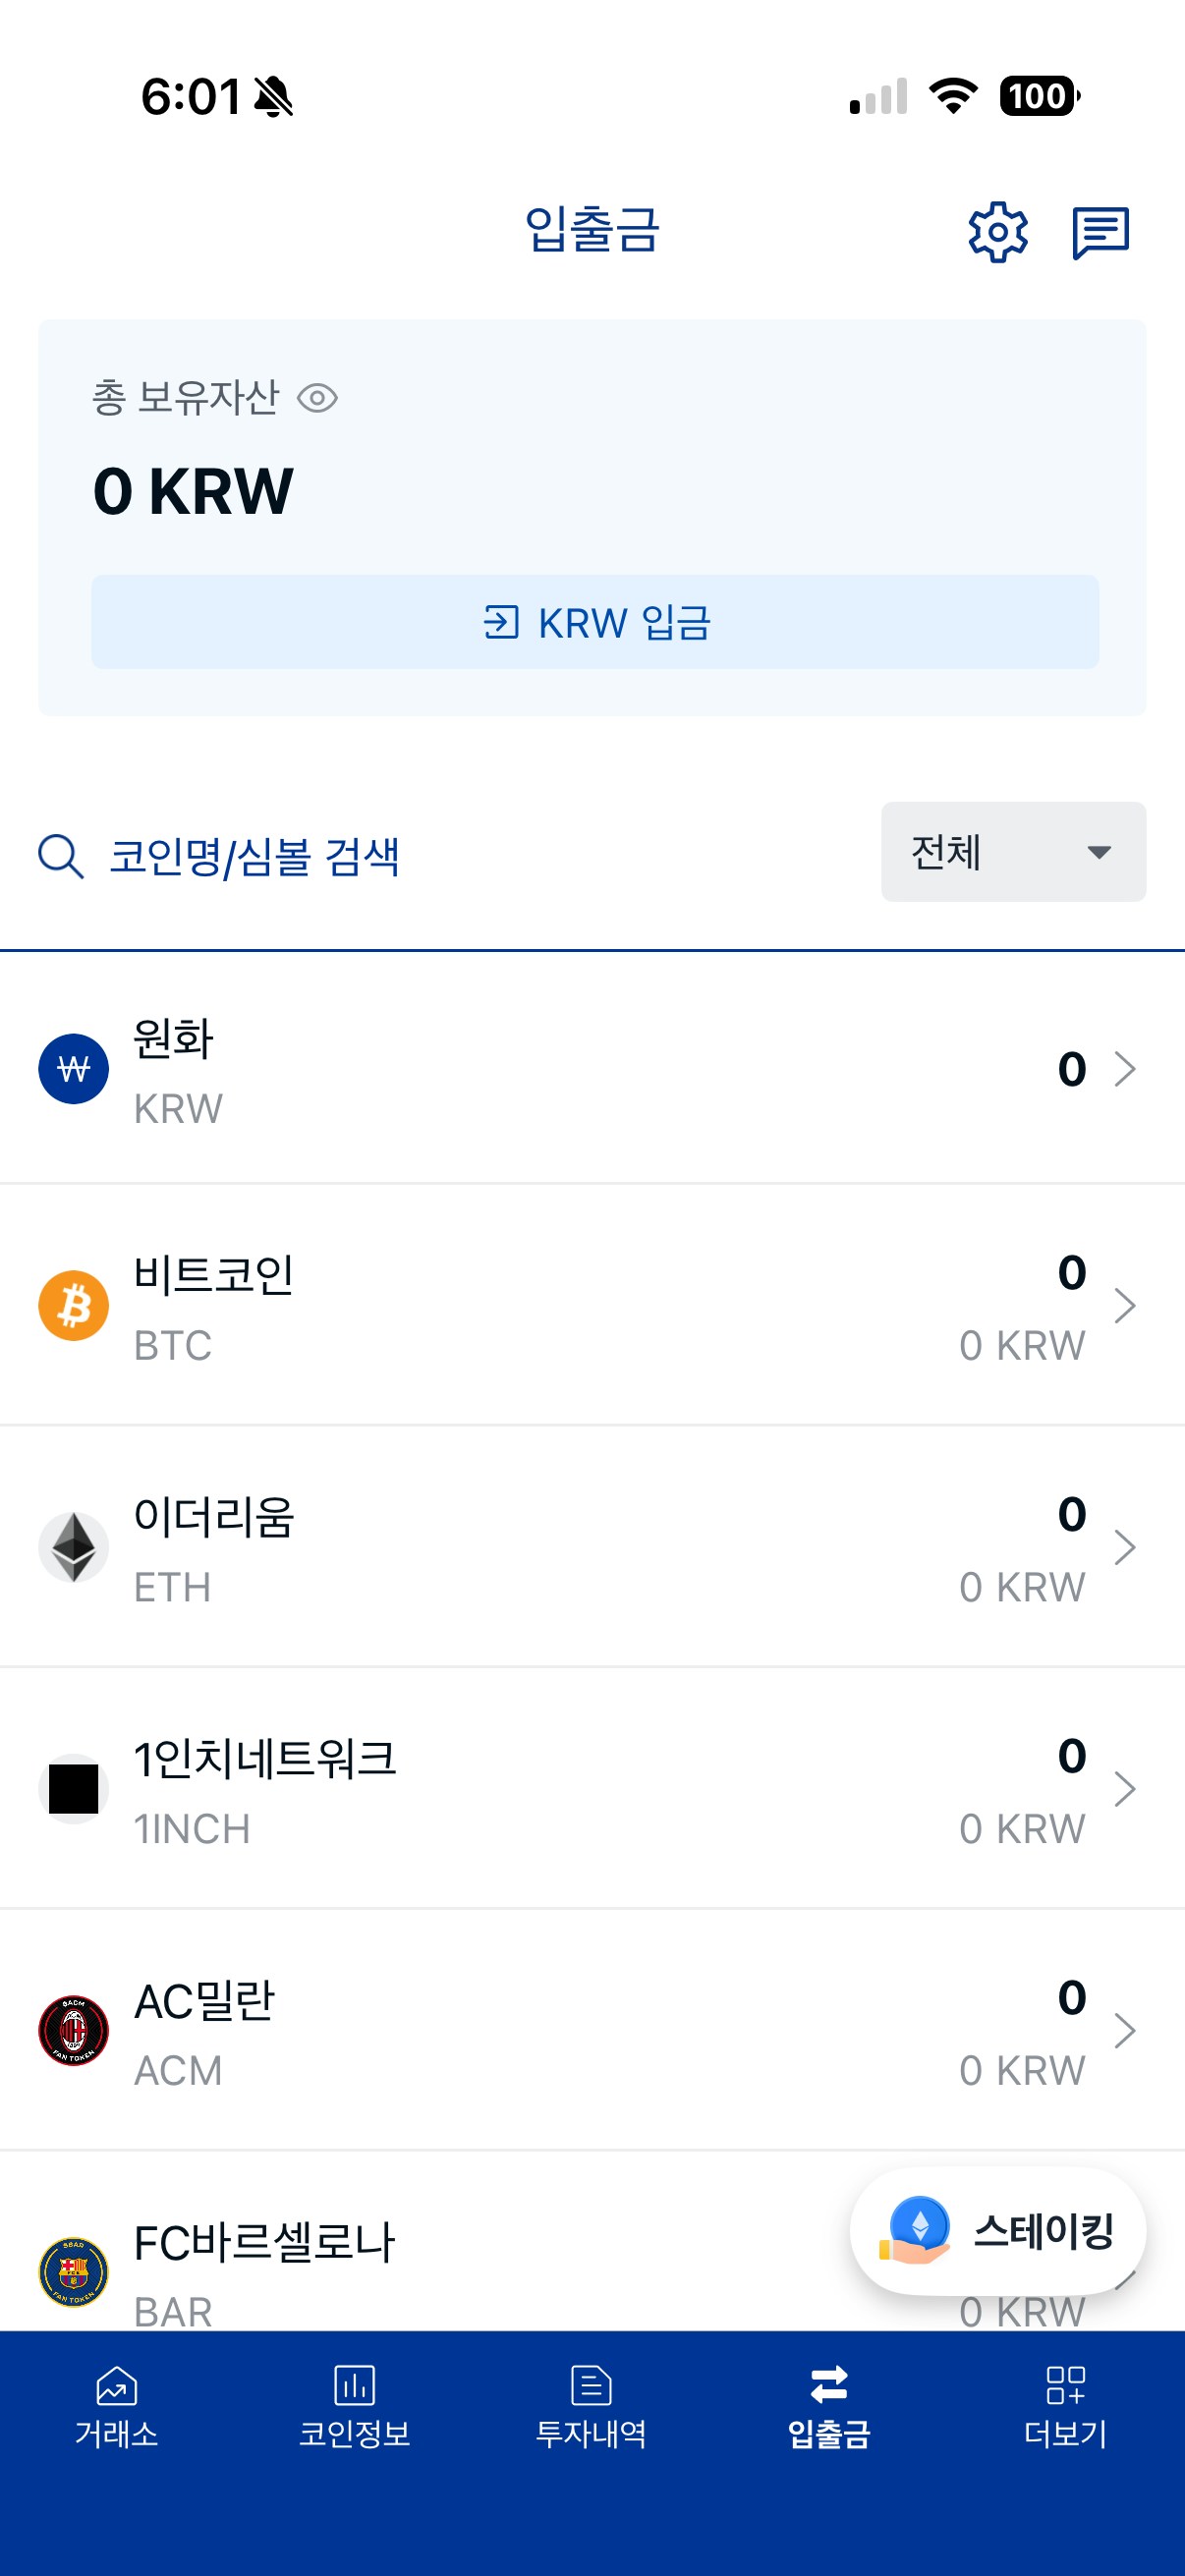
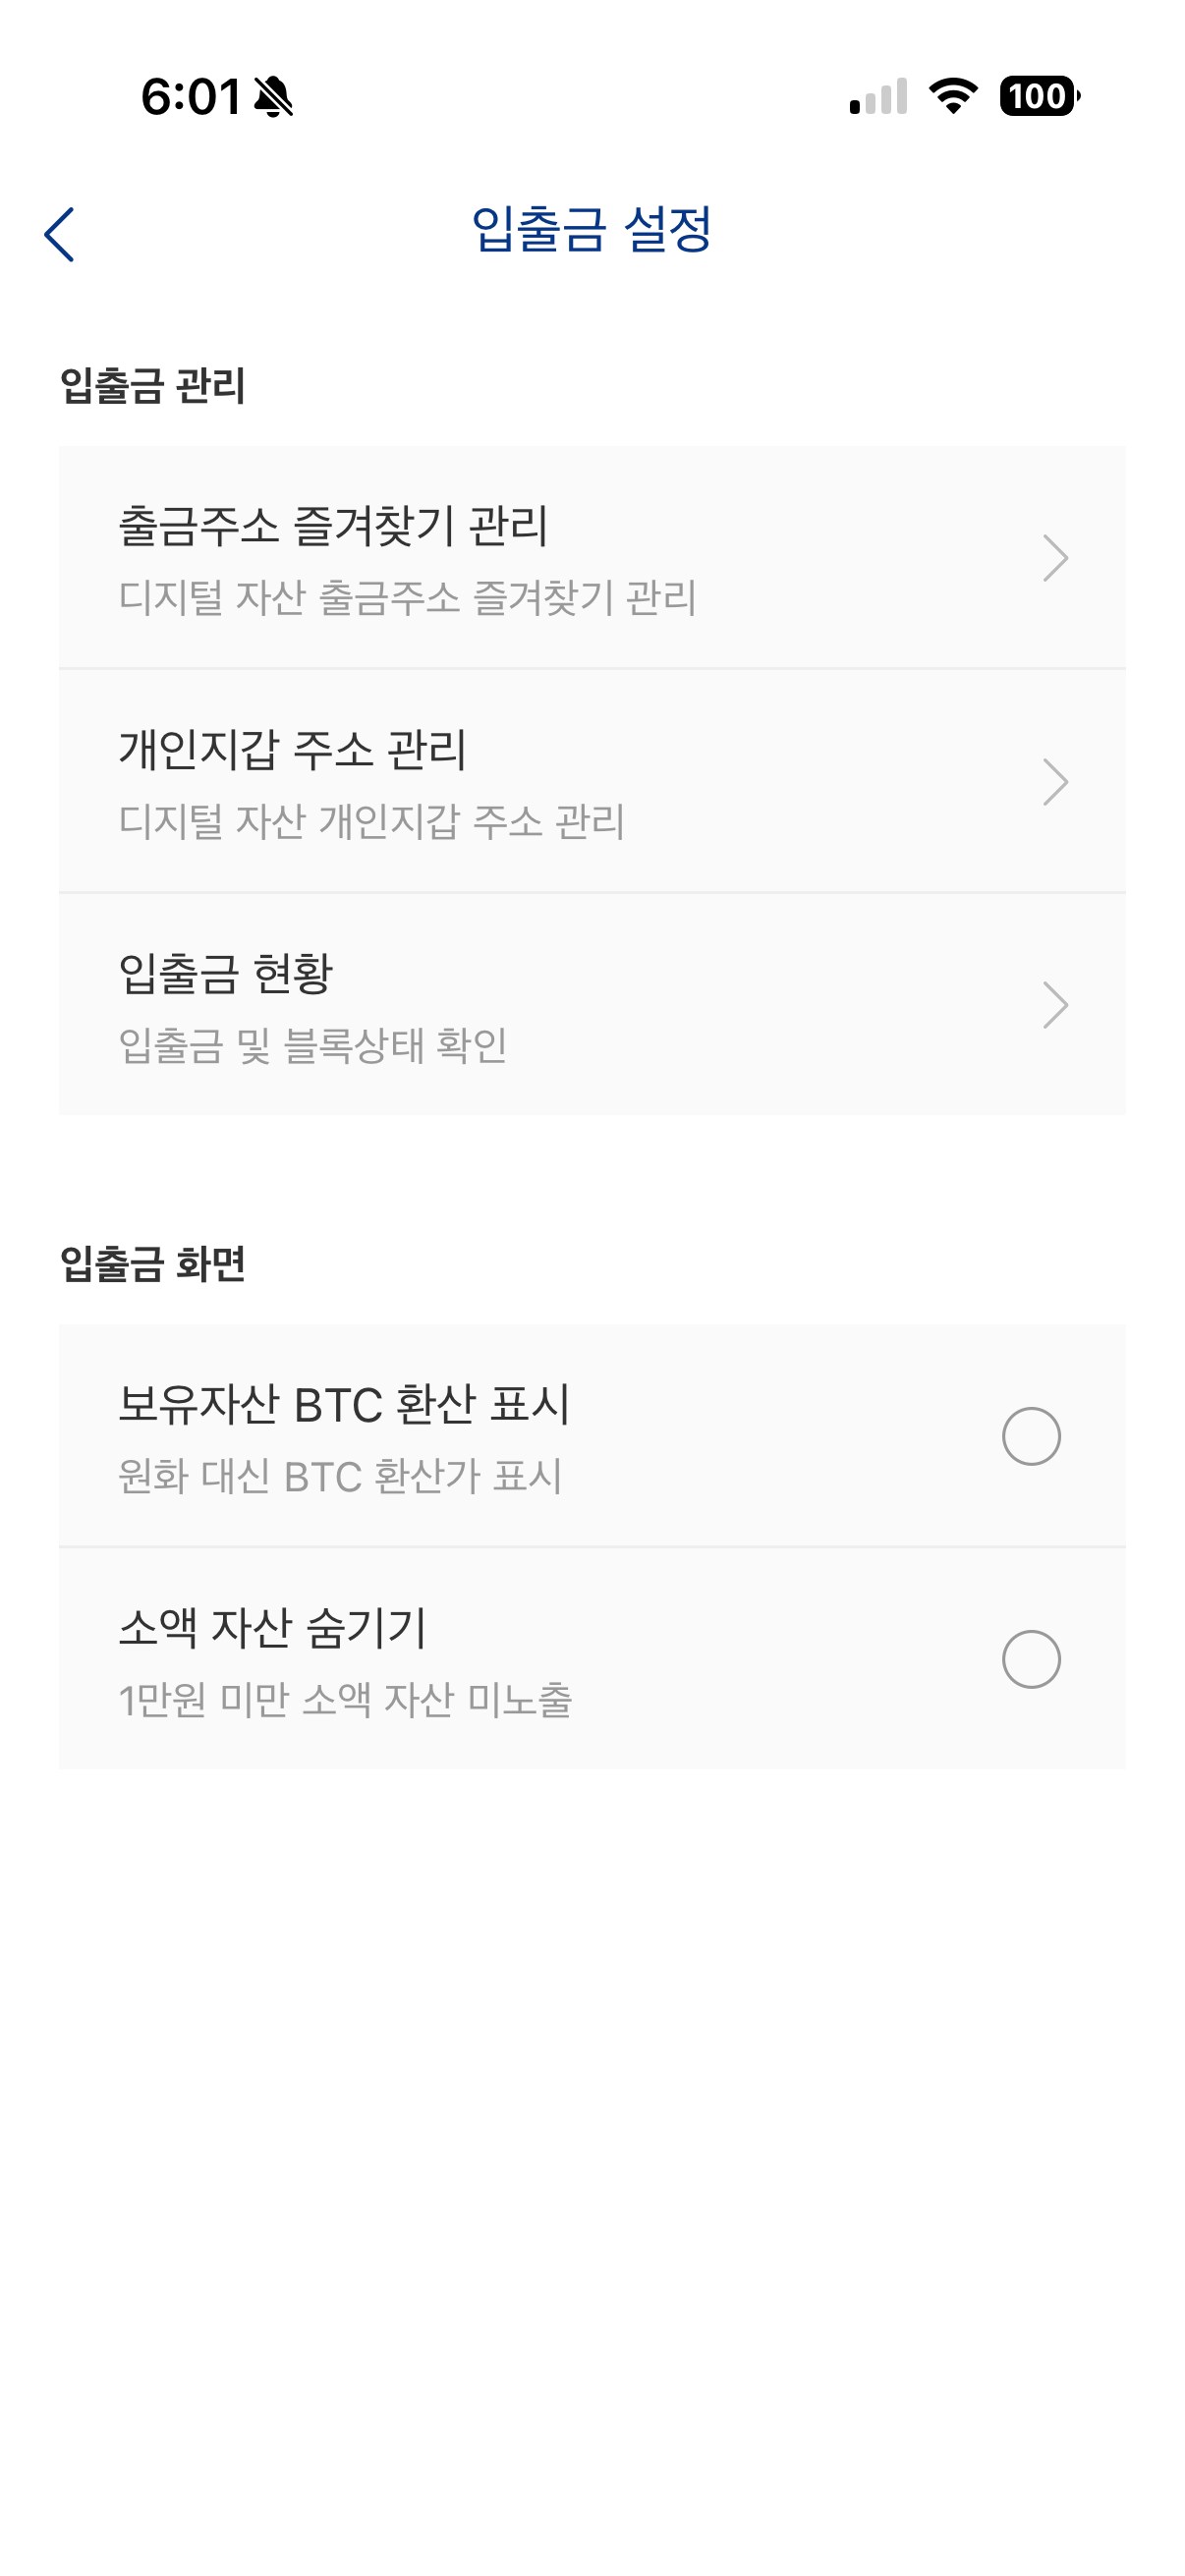
Bithumb withdrawal flow (app)
Bithumb withdrawal flow (app)
Notice: Pre-register your Kaia wallet address
To withdraw crypto to a personal wallet from Bithumb, you must pre-register a wallet address you own via a whitelist process.
- If the address is not registered, withdrawals are limited to less than 1,000,000 KRW.
- Pre-registration is required to withdraw 1,000,000 KRW or more.
- We recommend pre-registering even for amounts under 1,000,000 KRW.
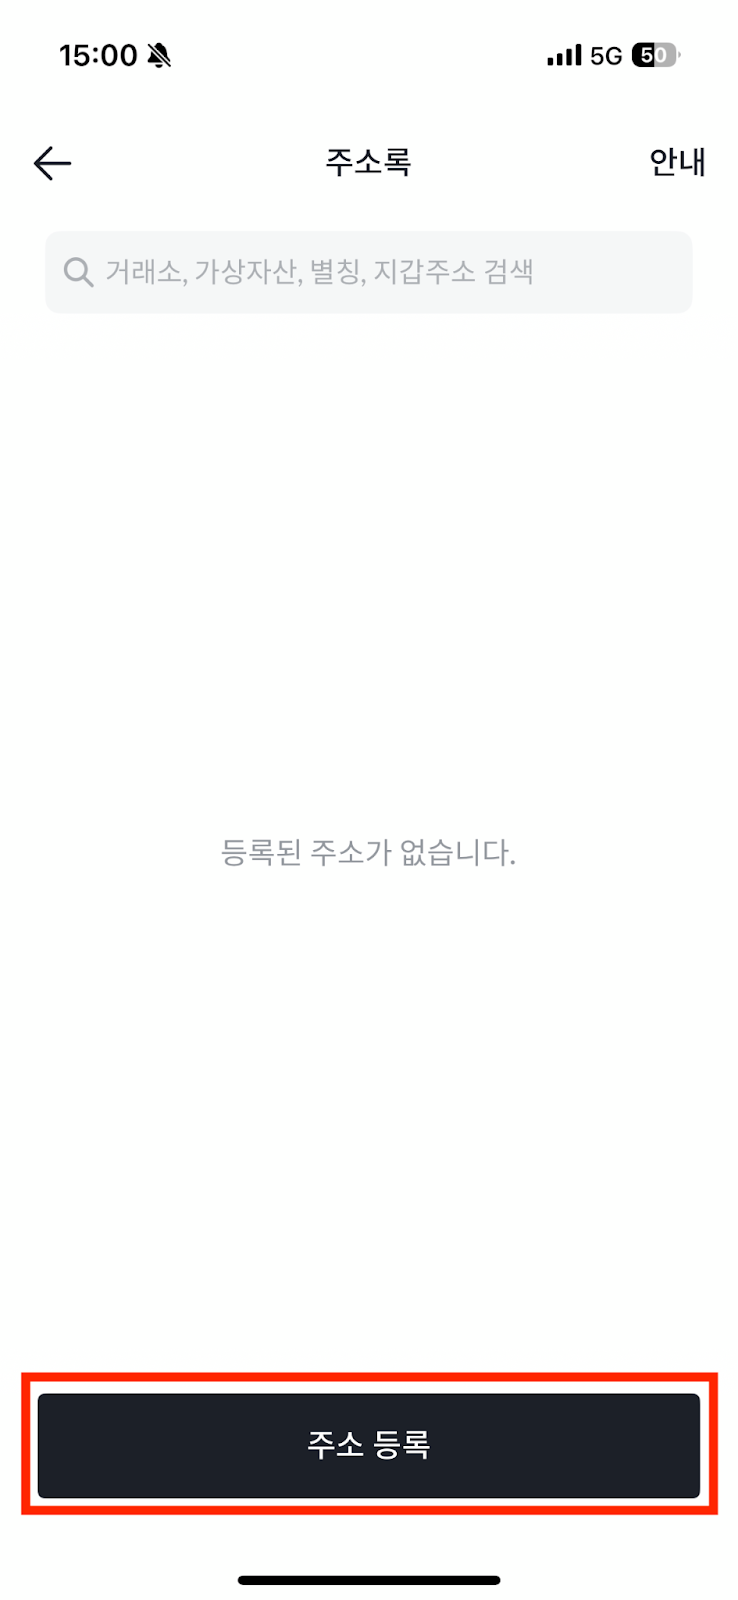
Start address registration
Log in to the Bithumb app -> bottom Deposit/Withdraw tab -> top Address Book -> select Register Address.
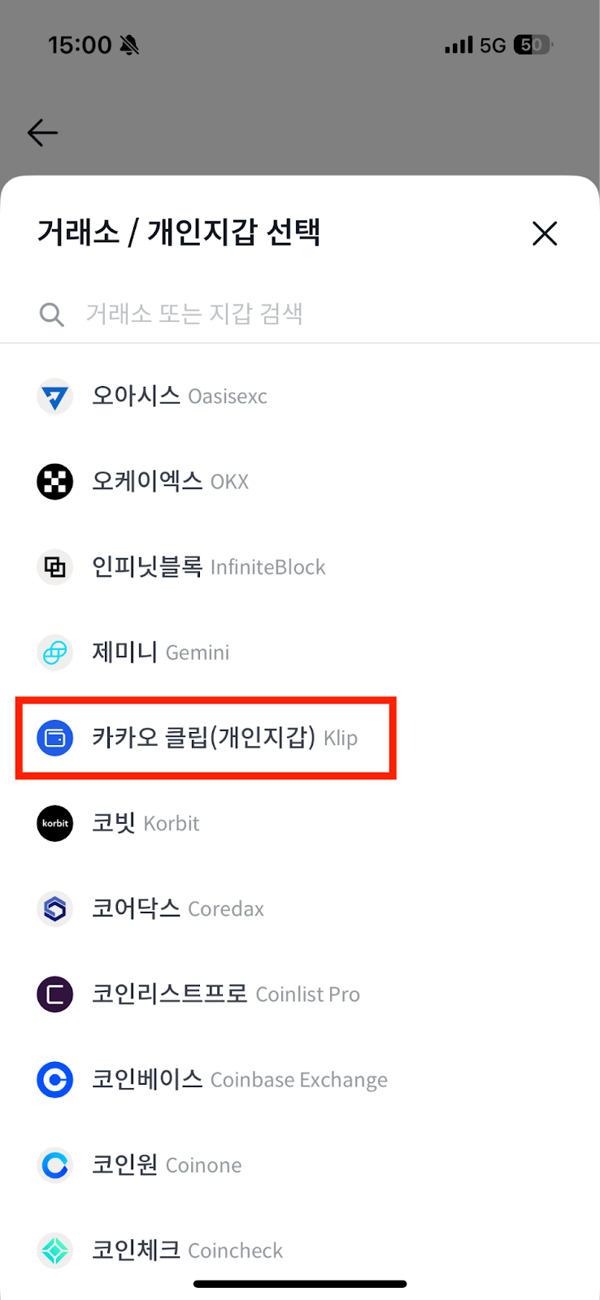
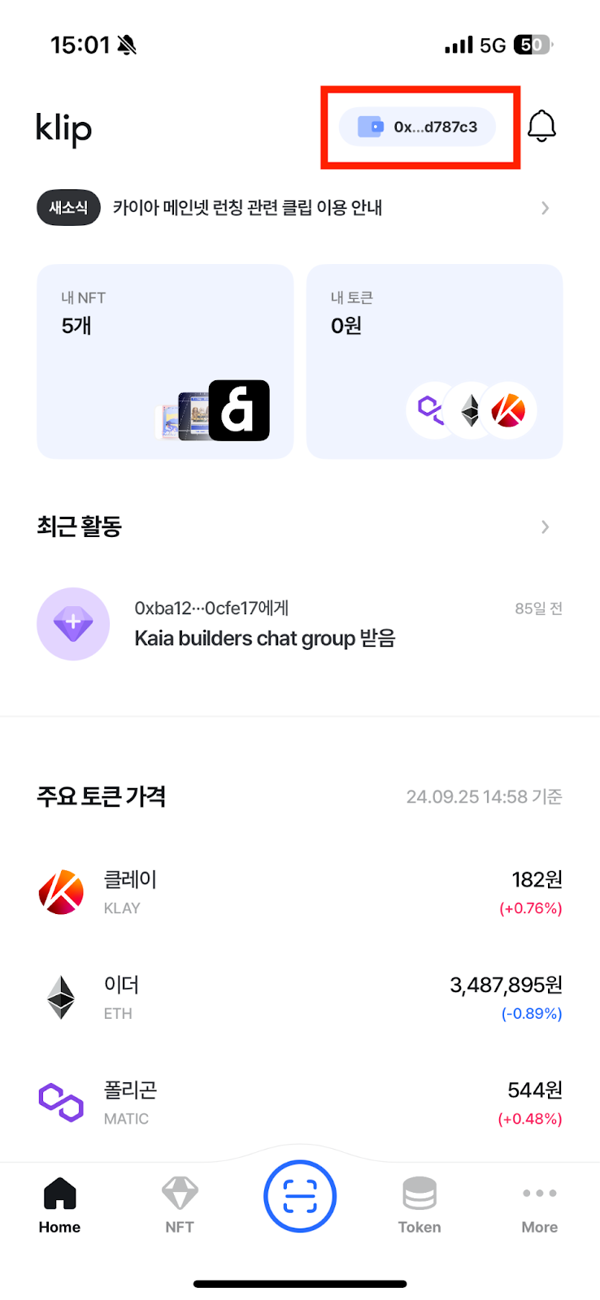
Select Klip, the wallet type supported by Bithumb.
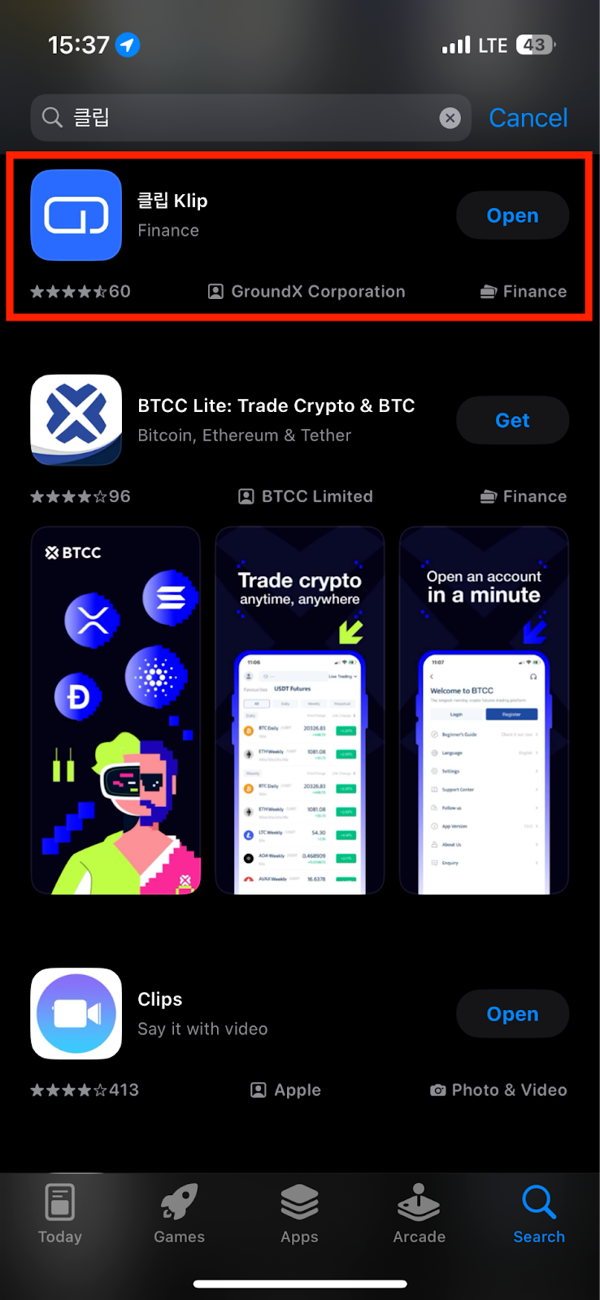
Install Klip wallet and copy address
- Download the Klip app from the Android Play Store or iOS App Store
- Open the Klip app -> top-right wallet icon -> tap Copy under your personal wallet address
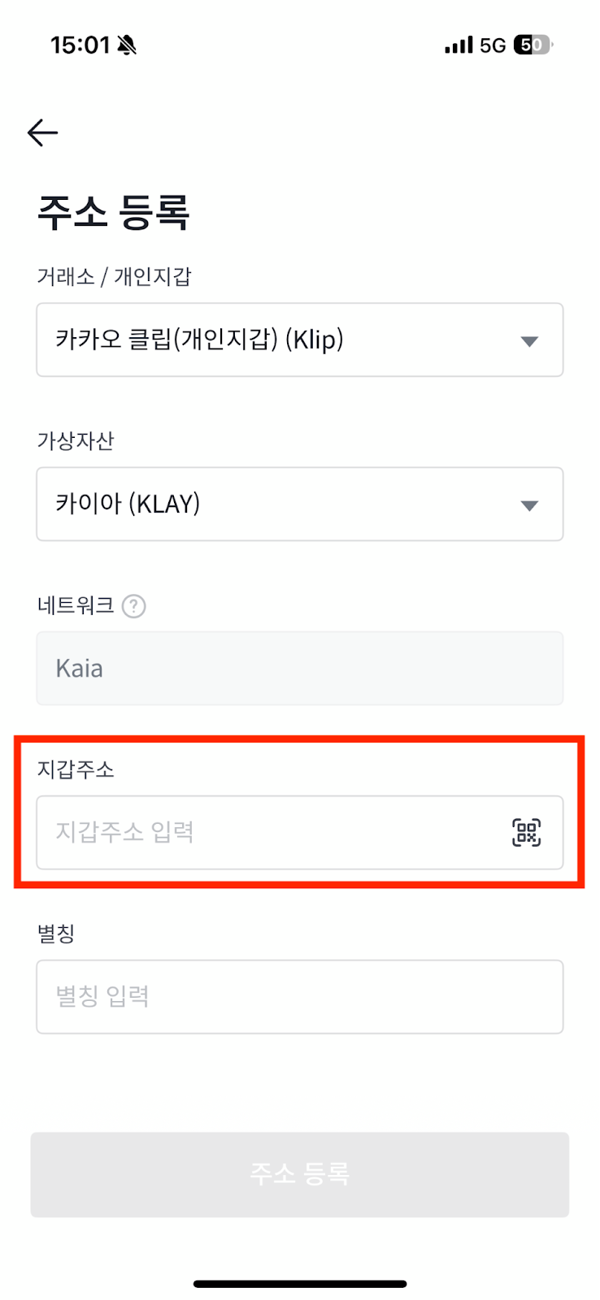
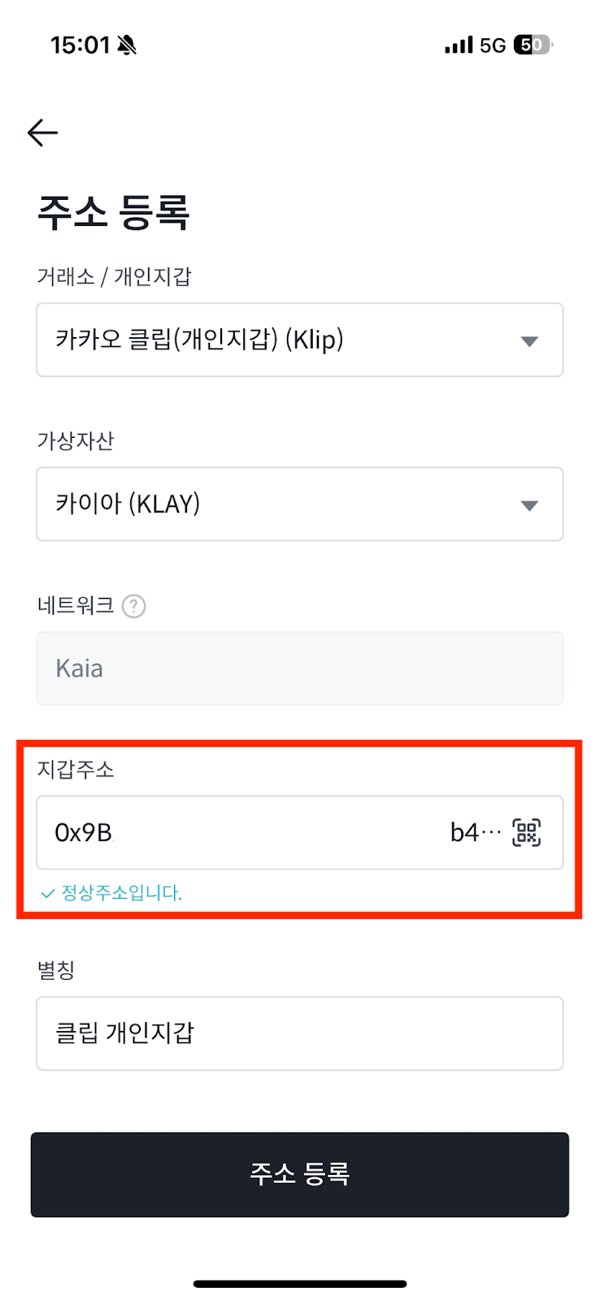
Enter address registration information
- Paste the wallet address on the Bithumb registration page
- Check the valid address confirmation message
- Enter an alias and click Register Address
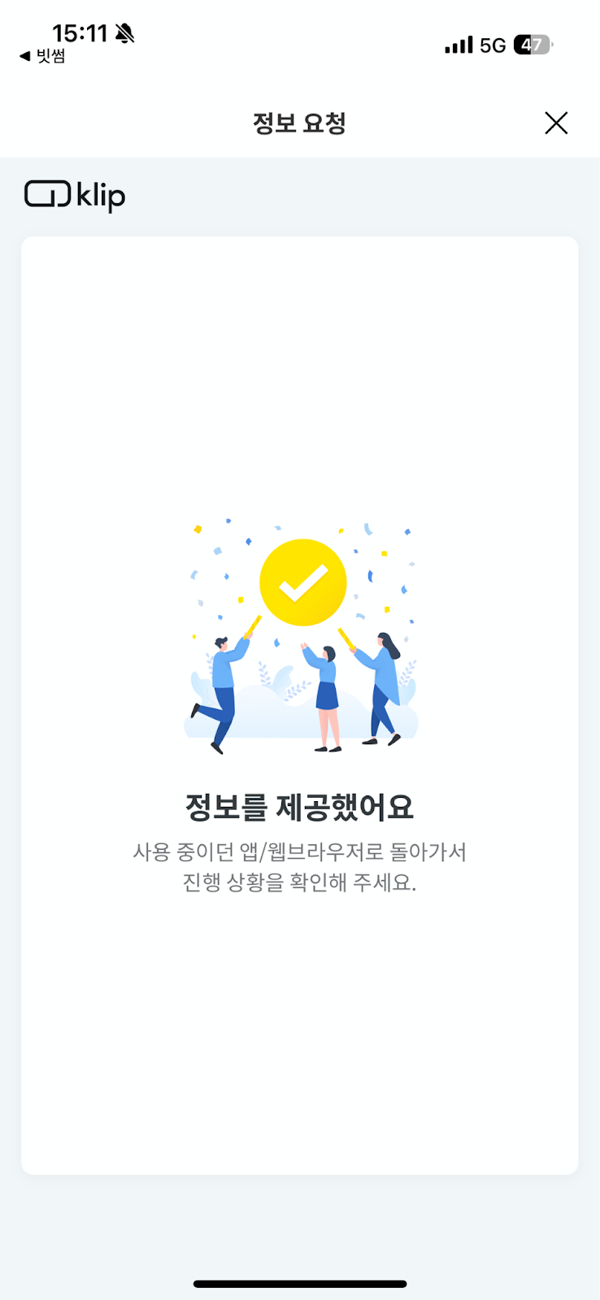
After address registration, proceed with Additional Information Registration.
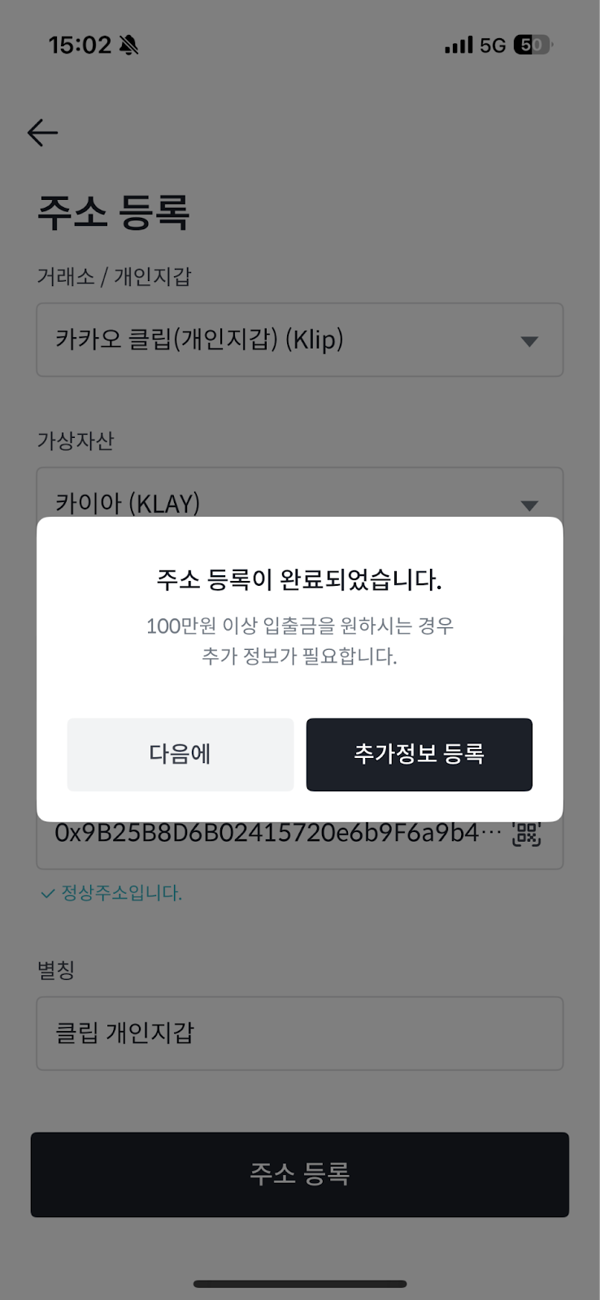
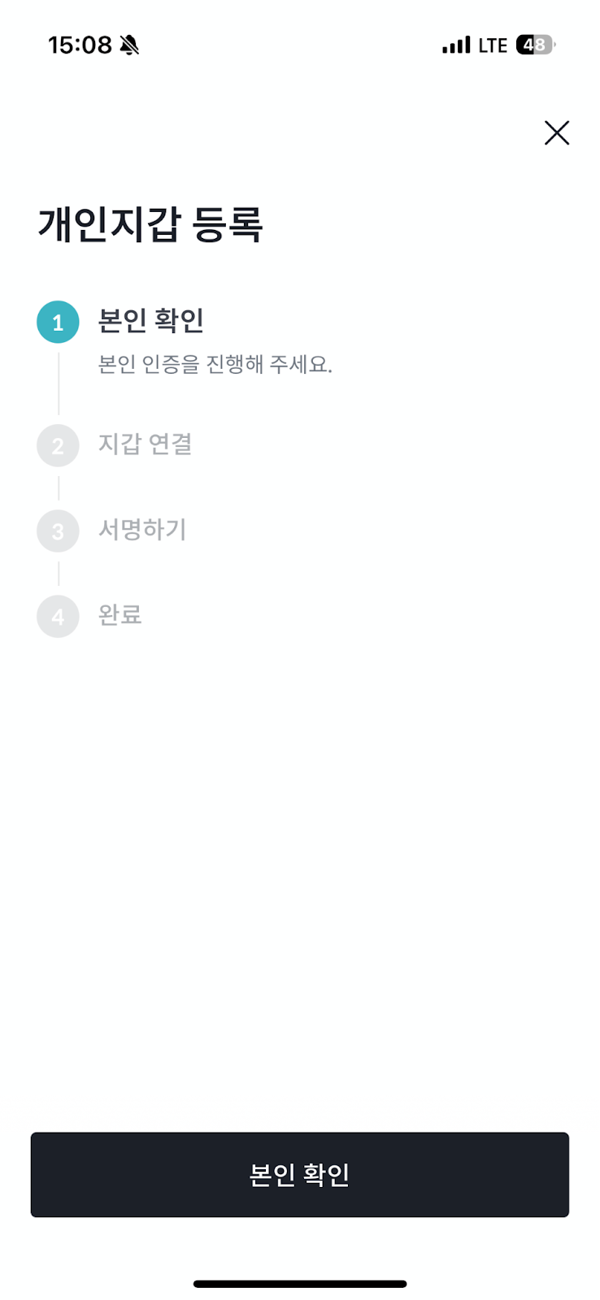
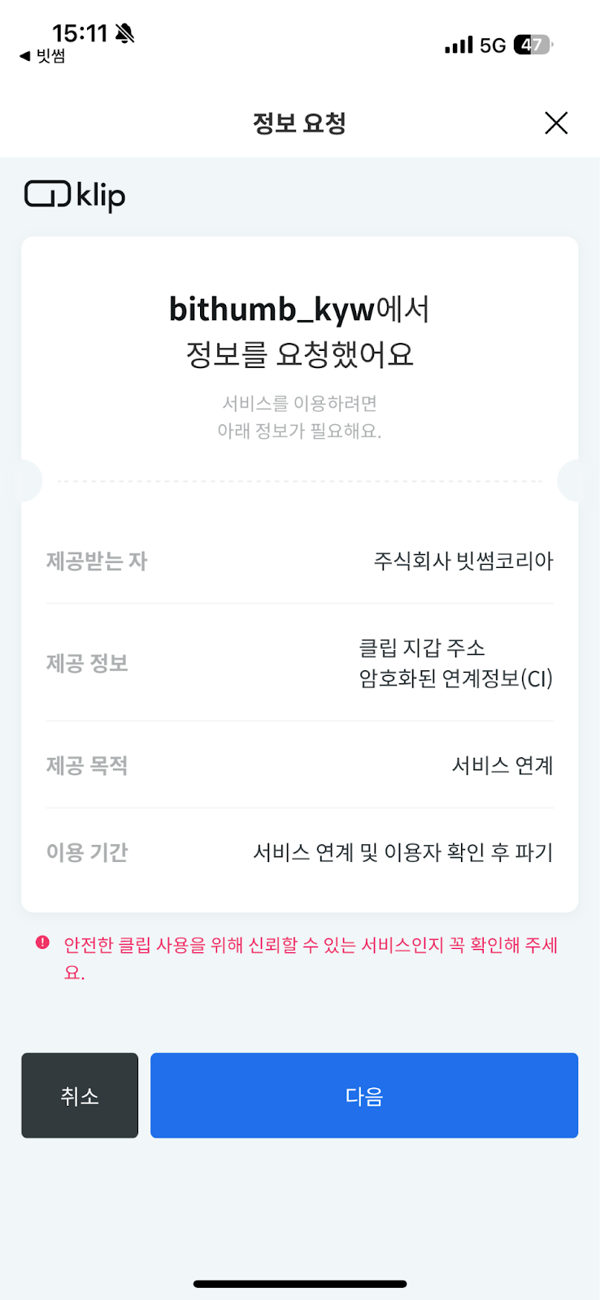
Additional info registration (identity, connection, signature)
- Tap Verify Identity -> complete phone verification in the PASS app
- Tap Connect -> switch to the KakaoTalk in-app Klip info request page
- Provide info and finish with Next -> return to the Bithumb app
- Tap Sign -> complete the signature to confirm wallet ownership
Tap Done at the end to finish personal wallet registration.

Withdraw Kaia USDT from Bithumb
- Bithumb app -> Deposit/Withdraw tab -> Select Tether -> Choose Kaia as withdrawal network -> Select recipient address
- Select your pre-registered Klip wallet address
- Complete phone number verification and submit Kaia USDT withdrawal
Withdrawals may take up to 30 minutes depending on exchange review status. If delayed, contact customer support.
2-2. Move assets from another chain to Kaia
Using a bridge
Using a bridge
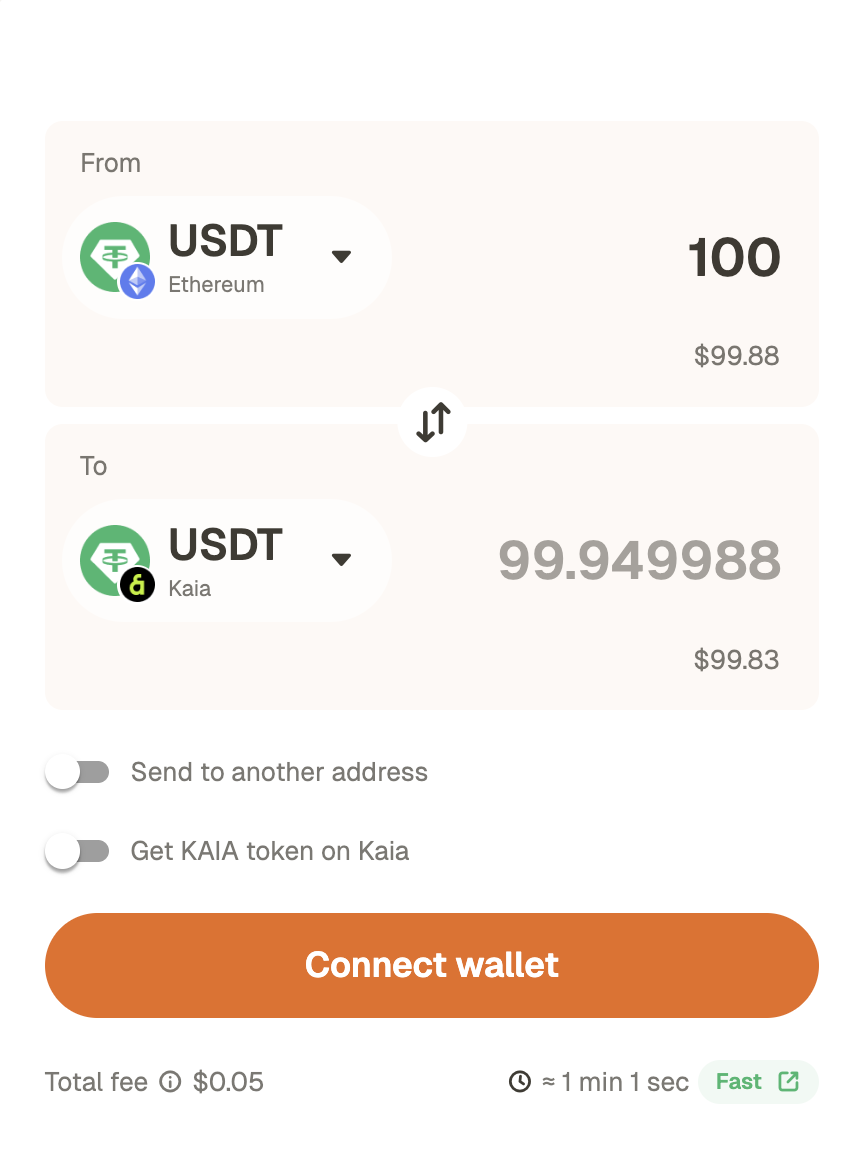
- If you hold USDT on another chain, go to the top menu and select “Get USDT” -> “Bridge”.
- You can easily move USDT from another chain via the Rhino.fi bridge.
3. Confirm deposit in your wallet
Deposit confirmation steps
Deposit confirmation steps
Check tokens/balance
If the token is not visible, you may need to select “Show (add) token.”
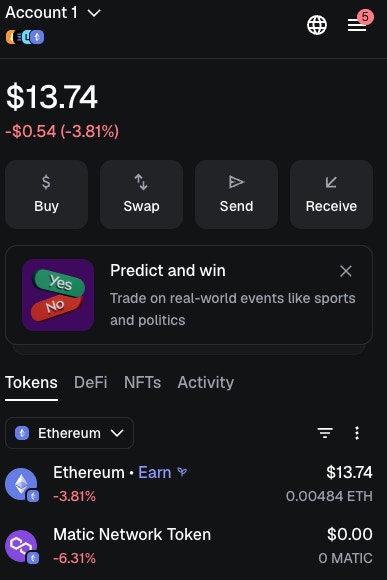
4. Connect your wallet & use SuperEarn
Once USDT is ready in MetaMask, connect your wallet to SuperEarn and make a deposit.SuperEarn deposit steps
SuperEarn deposit steps
SuperEarn withdrawal steps
SuperEarn withdrawal steps
- Tap the ‘Withdraw’ button in the app to withdraw the amount you want.
- Assets can be withdrawn at any time, and all steps are managed transparently and securely by the protocol.
- Note:
- Some products require a withdrawal window of about a day for safety and rebalancing.
Common mistakes/errors checklist
- Network mismatch: If the exchange withdrawal network and the MetaMask (and SuperEarn) network differ, assets will not arrive on the intended chain.
- Incorrect address/clipboard tampering: After pasting the address, recheck the first 6 and last 4 characters.
- Insufficient gas: On the Kaia network, USDT approve/deposit transactions may require a small amount of gas. Gas can be paid in KAIA or USDT.
- Exchange withdrawal restrictions: Withdrawals may be restricted if travel rule/whitelist/extra verification steps are incomplete.
(1) Verify the TxID from the exchange withdrawal history ->
(2) Check the transfer status in the explorer ->
(3) Verify MetaMask network/token display
Sources and references
- Binance FAQ: How to Withdraw Crypto from Binance (Official Guide)
- Upbit Help Center: How to register a personal wallet address
- Upbit Help Center: Personal wallet withdrawals under 1,000,000 KRW (example screens included)
- Kaia Docs: Connecting MetaMask to Kaia (network values and example screens)